Difference between revisions of "New Player Guide"
m |
m (→Character Creation) |
||
| (71 intermediate revisions by 21 users not shown) | |||
| Line 1: | Line 1: | ||
| − | This page will hopefully provide a walkthrough of the most basic course in URW, "Living in the Wild". | + | This page will hopefully provide a walkthrough of the most basic course in URW, "Living in the Wild". |
| + | |||
| + | But first, of course, we explain [[Character Creation|character creation]]. For the purposes of this guide, we'll assume that you know the basic movement keys and know what the interface means. If in doubt, the {{key|?}} key is your friend! It lists all the common commands. Remember that keys are case-sensitive in Unreal World, so {{key|?}} is activated by pressing {{key|Shift}}+{{key|?}} and not just {{key|?}}. You can also check the [[keyboard commands]] article. | ||
| + | |||
| + | Have fun! | ||
== Character Creation == | == Character Creation == | ||
| − | Common choices for your culture include the [[Owl-Tribe]] and | + | The first step is to choose what type of character creation you want. Quick and easy skips over most of the character creation, dropping you straight into a world, ready to play. Custom is the standard method, while custom-easy allows you to 'degrade' each skill by up to two levels in the skill creation screen and reallocate those points to other skills and custom-too easy allows three points. |
| + | |||
| + | Common choices for your culture include the [[Owl-Tribe]] (generally strongest at survival skills{Survival has now been removed as of patch 3.30}) and the [[Kaumolaiset]] (generally a jack-of-all-trades). [[Cultures|Culture]] affects your starting [[Skill]] points, and will determine the possible range of your [[stats]] as detailed [[Cultures|here]]. | ||
| − | Next, you have to pick a starting [[season]]. | + | Next, you have to pick a starting [[Calendar|season]]. As of patch 3.30, [[Calendar|Spring]] now has snow in the earlier months/weeks, as well as ice covered lakes and rivers, meaning you will need to apply some of your winter survival skills, thus as the game recommends starting in [[Calendar|Summer]]; this wiki editor also recommends [[Calendar|Summer]]. You will still have PLENTY of time to prepare for [[Winter Survival|winter]]. by the end of summer there should be some [[berries]] and other wild [[plants]] you can [[Acquiring food|gather]]. [[Calendar|Spring]] Does have some advantages, if you want to test your skill/wit, because it's colder in spring you can dry food in the first couple of weeks, which means your supplies last longer. On the other hand, starting in Autumn may mean that you can gather lots of food such as the highly nutritious lake reeds that border most lakes. Be wary of harvesting villager's plants because they will get angry at you if you harvest anything inside a village, pasture, or field. |
| − | [[Stats|Physical attributes]] are up next. You can reroll as many times as you like until you get your perfect character. One of the most important stats are [[Agility]], [[Speed]] and [[Eyesight]], because they govern your [[Dodge]] skill. Try to go for the highest possible these three attributes. Another option is go for the biggest/heaviest [[body type]], because more body weight lets you carry more. You can improve stats with [[courses]], but you can not change body type. The biggest and heaviest can wear a lot heavy clothes before they affect much to their skills, which is a major consideration middle game. [https://dl.dropboxusercontent.com/u/52320907/URW%203.18%20Initial%20Profile%20%26%20Skills.pdf More] about cultures' attributes. | + | [[Stats|Physical attributes]] are up next. You can reroll as many times as you like until you get your perfect character. One of the most important stats are [[Agility]], [[Speed]] and [[Eyesight]], because they govern your [[Dodge (Skill)|dodge]] skill. Try to go for the highest possible these three attributes. Another option is go for the biggest/heaviest [[body type]], because more body weight lets you carry more. You can improve stats with [[courses]], but you can not change body type. The biggest and heaviest can wear a lot heavy clothes before they affect much to their skills, which is a major consideration middle game. See [https://dl.dropboxusercontent.com/u/52320907/URW%203.18%20Initial%20Profile%20%26%20Skills.pdf More] about cultures' attributes. |
| − | The next page shows 2 Rituals|rituals. Rituals are sort of like "spells". They will give your character certain benefits, or maybe appease the spirits so that they favor you. What rituals you start with are random. Possible starting [[ | + | The next page shows 2 [[Rituals|rituals]]. Rituals are sort of like "spells". They will give your character certain benefits, or maybe appease the spirits so that they favor you. Note that not all rituals have a guaranteed result and may only increase probability of a good outcome. What rituals you start with are random. Possible starting [[Rituals|rituals]] change according to what tribe you choose. |
Skills are pivotal in how well you'll survive. You have 5 skill points to put into whatever areas you want. Good skills to invest in are: | Skills are pivotal in how well you'll survive. You have 5 skill points to put into whatever areas you want. Good skills to invest in are: | ||
| − | * [[Physician (Skill)|Physician]] - so that your wounds heal better. | + | * [[Physician (Skill)|Physician]] - so that your wounds heal better. Increasing this skill can be difficult, as controlled (intentional) injury is a chore. The [[Blood-Staunching Prayer]] removes the need for this skill... provided you actually learn it before a Njerpez shoots you in the eye. |
| − | * [[Fishing (Skill)|Fishing]] - a | + | * [[Fishing (Skill)|Fishing]] - while not what it once was, still a valuable skill to generate food. Active fishing is useful even with low fishing skill (in the 30s) as long as you have a fishing rod, but nets are preferable. |
| − | * At least one | + | * At least one weapon skill, such as: |
| − | :: >>[[Club (Skill)|Club]] - | + | :: >>[[Club (Skill)|Club]] - since blunt attacks control damage to the hide of a catch. Clubs are readily crafted and iron maces/mauls are available, although they may fall behind other options against Njerpez. |
| − | :: >>[[Bow (Skill)|Bow]] - | + | :: >>[[Bow (Skill)|Bow]] - bow skill is very useful in hunting. Recommended, even if you don't choose any combat skill. |
:: >>[[Axe (Skill)|Axe]] - because you almost always have an axe on your hand. Good utilitarian combat skill. | :: >>[[Axe (Skill)|Axe]] - because you almost always have an axe on your hand. Good utilitarian combat skill. | ||
| − | :: >>[[Sword (Skill)|Sword]] or Flail - this is a pure anti-human combat skill, because these two classes of weapons don't have much use in day-to-day affairs. Sword is more popular than Flail, as many Njerpez sport a sword of some kind. | + | :: >>[[Sword (Skill)|Sword]] or Flail - this is a pure anti-human combat skill, because these two classes of weapons don't have much use in day-to-day affairs. Sword is more popular than Flail, as many Njerpez sport a sword of some kind. |
| − | :: >>[[Spear (Skill)|Spear]] because | + | :: >>[[Spear (Skill)|Spear]] - because javelins are readily crafted ranged weapons which can also melee in a pinch. A significant boon to players without bow skill, and can be of help to you long into the game. |
| − | * [[Cookery (Skill)|Cookery]] - this is a recommended skill, even though many protest that it has chance to raise. BUT, it's so very useful from the start. | + | * [[Cookery (Skill)|Cookery]] - this is a recommended skill, even though many protest that it has chance to raise. BUT, it's so very useful from the start. Food quality affects both nutrient level and trade value, making the skill a big help in early game whereas its importance fades once food becomes plentiful. |
| − | * [[Hideworking (Skill)|Hideworking]] - this is a strong recommendation because you don't have that many chances to practice it, EVEN if you play exclusively small animal hunter, a miserable way to make a living. Get it right at the start so that when you think about | + | * [[Hideworking (Skill)|Hideworking]] - this is a strong recommendation because you don't have that many chances to practice it, EVEN if you play exclusively small animal hunter, a miserable way to make a living. Get it right at the start so that when you think about tanning furs to trade with foreign traders, you'll have enough skill to make it worthwhile. |
| + | * [[Trapping_(Skill)|Trapping]] - trapping obviously helps you get enough food for the winter, but higher quality fox-traps are a good early-game trade good for players with poor carrying capacity. | ||
| + | * [[Timbercraft (Skill)|Timbercraft]] - can be raised quickly and won't help you in a fight, but proves surprisingly useful for trading. A tree on village outskirts can be reduced to 20 boards in a few hours, worth ~50 smoked cuts even at inferior quality. Great for solving food problems and getting early access to expensive items... provided local villages have something worth trading. | ||
Notice that you cannot raise your dodge skill. That's tied in directly with your character's Agility, and can only be raised by dodging enemy attacks in game. | Notice that you cannot raise your dodge skill. That's tied in directly with your character's Agility, and can only be raised by dodging enemy attacks in game. | ||
| − | Next, you | + | Next, a new game world is created and you are presented with a [[world map]] where you get to choose a starting location. You'll want to start in the southeast near Reemi (olive green). Some people think Driik (light blue) is better but there are almost no animals in Driik and Reemi's shops are almost as good as Driik. You can take a trip to Driik once you're all set up, but when you're just starting out, you can't afford the items in their shops anyway so starting there is pointless. Reemi has good enough items and you can actually do some hunting too. *CONTESTED! The difference in wealth between Driik and Reemi is underestimated. While hunters will prefer the game-rich lands of the Reemi, A player with significant carrying capacity and some measure of timbercraft skill can access high quality Driik items early by simply selling boards. |
| − | + | Notice your starting location, which is the dark red rectangle on the [[map]]. You can randomize your location until it fits your requirements. Notice its relative distance from certain geographical landmarks, like rivers, big lakes, coasts, etc... | |
| − | + | Almost done! Now we have to select a [[scenario]]. Unreal World features many starting scenarios, some easy, some hard. We'll go with the easiest one, I want to be a fisherman. That way, you'll have two nets so you won't starve to death and you can use them as a 'home base'. | |
Lastly, pick a [[course]]. We'll go with the second course, "Living in the Wild". Not only do courses give you a structure, it acts as a sort of tutorial, and gives us some nice rewards on the way! (Rewards include a pike, handaxe, and a shovel and seeds) | Lastly, pick a [[course]]. We'll go with the second course, "Living in the Wild". Not only do courses give you a structure, it acts as a sort of tutorial, and gives us some nice rewards on the way! (Rewards include a pike, handaxe, and a shovel and seeds) | ||
| Line 40: | Line 48: | ||
:5 points to be allocated to your [[stats|attributes]] or, | :5 points to be allocated to your [[stats|attributes]] or, | ||
:3 points to be allocated to your [[skill]]s or, | :3 points to be allocated to your [[skill]]s or, | ||
| − | :learn 2 new Rituals|rituals. | + | :learn 2 new [[Rituals|rituals]]. |
| − | Don't pick [[ | + | Don't pick [[Rituals|rituals]], you'll learn them anyway. Up to you whether you want to pick skills or attributes. If your attributes are all really great (the {{key|Shift}}+{{key|P}}rofile shows most of the bars all the way full), then pick skills, but otherwise: skills can be raised and this is the only way to increase attributes. |
| − | Now is also a good time to learn a little something about | + | Now is also a good time to learn a little something about [[Trading|trade]]. Trade is a reliable source of food in the event that your early fishing, hunting or trapping attempts turn up fruitless. Doubtless you will want to purchase more expensive tools or weapons as well as you progress, so having an idea of how to earn them in advance will prove valuable. |
== Starting Out == | == Starting Out == | ||
| − | '''*Note*''' '''The hotkeys have been updated to the version 3. | + | '''*Note*''' '''The hotkeys have been updated to the version 3.40b3''' |
| − | + | ===Starting the ''Living in the Wild'' course=== | |
| − | + | First things first, unless the course menu pops up immediately, we'll start the course by hitting {{key|F5}}, which should bring it up. | |
| − | The | + | ===Water=== |
| + | The first task it wants you to do is to find some water, and take a drink. Not too difficult, eh? Just walk around with the arrow keys till you find a lake, then walk next to it and press {{key|q}} for quaff. Task complete! | ||
| − | + | <gallery> | |
| + | File:Gamecourse litw water.jpg|"Water" objective | ||
| + | File:Gamecourse litw water complete.jpg|"Water" objective completed | ||
| + | </gallery> | ||
| − | + | ===Picking up=== | |
| − | + | <gallery> | |
| + | File:Gamecourse litw picking up.jpg|"Picking up" objective | ||
| + | File:Gamecourse litw picking up complete.jpg|"Picking up" objective completed | ||
| + | </gallery> | ||
| − | + | ===A closer look=== | |
| + | Next, the game wants you to zoom in. You can either walk to a village, where it'll force you to zoom in, or just hit {{key|Enter}}. Either way, now we have to pick something up. That shouldn't be hard at all, just press {{key|,}} when you walk over something interesting. | ||
| − | + | <gallery> | |
| + | File:Gamecourse litw a closer look.jpg|"A closer look" objective | ||
| + | File:Gamecourse litw a closer look complete.jpg|"A closer look" objective completed | ||
| + | </gallery> | ||
| − | + | ===Make a fire=== | |
| + | The next task is making a [[Fire|fire]]. You will soon learn that fire is your best friend for survival, as it will help you to keep warm and for cooking. <s>Making a fire depends on the [[Survival (Skill)|survival skill]].</s> (Removed as of 3.30) | ||
| − | + | Walk up next to a tree and press {{key|Alt}}+{{key|m}} to use your [[timbercraft skill]]. Select the option to 'cut branches/twigs from a tree' ({{key|T}} key). You should get 10-20 branches or twigs. Use {{key|p}} key to push at least 3 of them to an empty square next to you and then use {{key|f}} key to try to start a fire. The chance of success is 50 % so you might need to try a couple times. | |
| + | <s>Walk up next to a tree, and press {{key|Alt}}+{{key|v}} to bring up the survival menu. Pick the option '{{key|c}}ut branches from tree' to get somewhere in the range of 10 - 20 branches. Keep doing this until you have around 25 branches, then walk one square away, open the survival menu and pick '{{key|b}}uild a Fire'. Hit {{key|F5}} when you're done.</s> | ||
| − | + | <gallery> | |
| − | + | File:Gamecourse litw make a fire.jpg|"Make a fire" objective | |
| + | File:Gamecourse litw make a fire complete.jpg|"Make a fire" objective completed | ||
| + | </gallery> | ||
| − | + | ===Cookery=== | |
| + | Cooking food is crucial, as it improves the nutrition quality of your food, and usually allows you to keep it longer before it spoils. It depends on the [[Cookery (Skill)|Cookery skill]]. | ||
| − | + | You should now have a raw [[Pike|pike]] in your inventory. Standing next to a fire, open up the cooking menu, {{key|Alt}}+{{key|c}} and pick {{key|r}}oast. Choose the pike, and start it roasting. You only need the fire when starting the cooking task. It doesn't matter if it goes out immediately after you've left the pike to cook. | |
| − | + | If you are standing nearby, you will receive the prompt, "it smells like the roasted pike is ready" when the pike is ready. If you try to pick it up before it's done, you'll get a message telling you how long it's going to take until it's ready. You can use the {{key|-}} key to pass time until the pike is ready and press {{key|Esc}} to stop when you get the message about it being ready. If left for too long, the pike will burn! When your pike is done, you will have finished another task. | |
| − | + | <gallery> | |
| + | File:Gamecourse litw cookery.jpg|"Cookery" objective | ||
| + | File:Gamecourse litw cookery received pike.jpg|Receiving a fresh pike for free | ||
| + | File:Gamecourse litw cookery complete.jpg|"Cookery" objective completed | ||
| + | </gallery> | ||
| − | + | ===Timberwork=== | |
| + | Wood is the resource you will use the most : to make [[fire]], for [[Building (Skill)|construction]], or to [[crafting|craft]] objects. So, you'll now have to cut down a tree, using the [[Timbercraft (Skill)|timbercraft]] skill. | ||
| − | + | There are two kinds of tree in URW: normal trees and slender trees. Normal trees give you a whole tree trunk when chopped down, but you need an axe for them. [[slender tree trunk|Slender trees]] can be cut down with just a knife (although it will go faster with an axe) and they will give you 3 - 5 [[Slender tree trunk|slender tree trunks]], which is a completely different item. Go ahead and cut down a slender tree. They look smaller than ordinary trees, and if you walk into them, you should get a message along the lines of 'A young (whatever type of tree) is blocking your way'. Cut them down by opening up your Timbercraft menu {{key|Alt}}+{{key|m}} then picking '{{key|f}}ell a tree'. | |
| − | + | <gallery> | |
| + | File:Gamecourse litw timberwork.jpg|"Timberwork" objective | ||
| + | File:Gamecourse litw timberwork complete.jpg|"Timberwork" objective completed | ||
| + | </gallery> | ||
| − | + | ===Do it yourself=== | |
| + | One of the fun part in URW is to make your own objects. More information is available in the [[crafting]] article. | ||
| − | + | The game now wants you to make something using the 'Make' menu, accessed via {{key|Shift}}+{{key|M}}. Stand next to the slender [[tree trunk]]s you've cut down. Open the {{key|Shift}}+{{key|M}}ake menu, and choose {{key|l}}umber then {{key|2}} Staff. Make at least one slender tree trunk into a staff. The task will be finished, but just wait! If you want, you can use these staffs to make a spear class throwing weapon, [[Javelin|javelins]]. Make sure you're standing next to a fire, then open the {{key|Shift}}+{{key|M}}ake menu, pick {{key|w}}eapons, {{key|4}} javelin, and turn your staffs into javelins if you so desire. | |
| − | + | Alternatively, you can make a club from a slender tree trunk. It's useful as a blunt melee weapon and can also be used for [[tanning]]. | |
| − | + | <gallery> | |
| + | File:Gamecourse litw do it yourself.jpg|"Do it yourself" objective | ||
| + | File:Gamecourse litw do it yourself complete.jpg|"Do it yourself" objective completed | ||
| + | </gallery> | ||
| − | + | ====''Sleeping (not a course task, but still useful...)''==== | |
| + | At this point, your character will be hungry, thirsty and tired. Find a water source and have a drink (if you're in a village, all villages have some sort of water source, be it a little pond or a whole lake), {{key|e}}at your pike and take a nap (preferably in a building, if you're near a village). To sleep, press {{key|Shift}}+{{key|Z}}, or {{key|/}} for the movement and rest menu and then {{key|s}}leep. | ||
| − | + | ===Fishing=== | |
| + | Fishing is a reliable source of food all year round. It uses the [[Fishing (Skill)|fishing skill]]. To use a net, you'll need to use a raft or punt, you cannot do it by hands. | ||
| + | When you wake up, continue the course. This time, we need to go fishing, and for that you'll get a [[fishing rod]]. Walk up to a lake or river (those little ponds don't count) and use your {{key|Alt}}+{{key|f}}ishing skill and choose '{{key|1}} Active Fishing' and then the fishing rod, at this point feel free to sit back and relax. The fishing will go on for around 3 in game hours, less if you manage to catch something. In this part of the course, you don't actually have to catch anything. | ||
| + | |||
| + | <gallery> | ||
| + | File:Gamecourse litw fishing.jpg|"Fishing" objective | ||
| + | File:Gamecourse litw fishing receivedrod.jpg|Receiving a fishing rod for free | ||
| + | File:Gamecourse litw fishing complete.jpg|"Fishing" objective completed | ||
| + | </gallery> | ||
| + | |||
| + | ===Shelter in the woods=== | ||
| + | Once you're done, we have to make a [[shelter]]. Shelters need 3 slender tree trunks and 20 [[Spruce Twig|spruce twigs]] nearby, in your inventory or at most 1 tile away from you. Spruce twigs come from spruce trees, by using your [[timbercraft skill]] {{key|Alt}}+{{key|m}} and selecting the option to 'cut branches/twigs from a tree' ({{key|T}} key). One good trick is to find a young spruce tree, harvest twigs, then chop it down for the slender tree trunks. Use the Build menu {{key|M}} to make a {{key|s}}helter. | ||
| + | |||
| + | <gallery> | ||
| + | File:Gamecourse litw shelter in the woods.jpg|"Shelter in the woods" objective | ||
| + | File:Gamecourse litw shelter in the woods complete.jpg|"Shelter in the woods" objective completed | ||
| + | </gallery> | ||
| + | |||
| + | ===Spells=== | ||
| + | Now we have to perform a [[Ritual (Skill)|ritual]] {{key|F4}}. Rituals in URW come in two types: asking the spirits for help, or sacrificing something to the spirits. Anyways, just perform any ritual you like (all characters start with two). If you have [[Oath of Iron]], you should use them on your metal weapons, so that they will become better weapons. | ||
| + | |||
| + | <gallery> | ||
| + | File:Gamecourse litw spells.jpg|"Spell" objective | ||
| + | File:Gamecourse litw spells complete.jpg|"Spell" objective completed | ||
| + | </gallery> | ||
| + | |||
| + | == Tracking == | ||
| + | ===Search for the wildlife=== | ||
| + | [[Hunting]] is another important resource in Unreal World, as animals provide [[fur]] and [[food]]. The following task deals with active hunting (opposed to passive hunting, or [[trapping (Skill)|trapping]]). But before making a kill, you need to find your prey... | ||
| + | |||
| + | The next task needs you to use your [[Tracking (Skill)|tracking skill]] to find some tracks. You will probably not find any on the zoomed-out map. Walk around looking for an animal. You will see them best if you are in a mire or if you are in a high area, like on a mountain or a hill. If you see an animal, or person, walk ''near'' where they are. Do not walk into them, especially if the picture was of a [[Njerpez|person in red]]! Use your tracking skill, {{key|Alt}}+{{key|t}}, repeatedly, then you should finish this task, but you might have to get an encounter with them and do the tracking on the zoomed in map, which is where tracking is most useful. | ||
| + | |||
| + | Some smaller [[Animal|animals]], which leave [[Tracking (Skill)|tracks]], can't be seen on the zoomed-out map. If you want to cheat, go to a village and walk around till you see little black smudges. Stand on one and type {{key|Alt}}+{{key|t}}. | ||
| + | |||
| + | <gallery> | ||
| + | File:Gamecourse litw tracking.jpg|"Tracking" objective | ||
| + | File:Gamecourse litw tracking received experience.jpg|Receiving an experience increase to Tracking for free | ||
| + | </gallery> | ||
| + | |||
| + | ===A kill=== | ||
| + | Next up is actually encountering an [[Animal|animal]]. If you've managed to find a fresh track, follow it until you collide with your prey. Zoom in, then hit F5 again to trigger the next step. You now have to [[combat|kill]] an animal. If you run into something big, like an elk or even a herd of forest reindeer, it may be better to leave them be, and just zoom back out to look for something smaller. If it's something small, like a squirrel, this should be no problem. Simply chase down your quarry, and let loose with a storm of javelins or blunt arrows or rocks in case of a squirrel (press {{key|t}} to throw or shoot) when you get close. If it falls down, {{key|Shift}}+{{key|R}}un to toggle, and {{key|0}} kick it till it goes down. If possible, use blunt attack on it to avoid damaging the hide. | ||
| + | |||
| + | Congratulations on your first kill! | ||
| + | |||
| + | <gallery> | ||
| + | File:Gamecourse litw a kill.jpg|"A Kill" objective | ||
| + | </gallery> | ||
| + | |||
| + | ===Hideworking=== | ||
| + | Now that you have killed your first prey, it is time to learn what to do with the skin. This is done with the [[Hideworking (Skill)|hideworking skill]]. | ||
| + | |||
| + | After you've hunted your animal, you have to skin and cut it. Remember to always skin the animal before cutting it up for meat, because after you cut it up, the carcass will disappear. Hit {{key|Alt}}+{{key|h}} to open up the Hideworking menu, and choose to '{{key|s}}kin a carcass'. Then, hit {{key|b}} to butcher the carcass for meat. You'll receive a couple pounds of meat, plus some fat. If you really want to (and can spare the food), you could sacrifice a bit of meat to the spirits. | ||
| + | |||
| + | I'd recommend that you set up a temporary camp somewhere close to a village, next to some sort of water source. Build a shelter by the water but outside the village, so that you can [[Hideworking (Skill)|tan]] your animal skin. Villagers have a habit of stealing anything that's not nailed down. Actually [[Hideworking (Skill)|tanning]] the skin will involve several steps in the hideworking menu {{key|Alt}}+{{key|h}}: first the skin must be {{key|c}}leaned, using water (of which you should have plenty, seeing as you're standing next to a lake). Then, use {{key|t}} for tan. The game will ask you for the animal skin, a cutting weapon, and some 'tanning material'. Tanning material can either be [[Bark|tree bark]], or animal fat. 99% of the time, an animal will leave enough fat for its skin to be tanned. If not, gather bark from a tree with the {{key|Alt}}+{{key|m}} Timbercraft menu. When done, the skin is left on the spot "being prepared" for some time and you cannot pick it up until the time has elapsed. When that time has passed, pick up the skin to {{key|t}}an again for the next steps. | ||
| + | |||
| + | All these steps can take hours or days for the skin to be tanned depending on its size. While we're waiting, make some more [[Crafting|crafts]] to trade, or replenish your javelin/arrow supply. However don't forget your skin, because if you let the skin uncared for too long in any of the intermediate steps it will rot and become useless. | ||
| + | |||
| + | After your hide is tanned, we're going to make a [[Trapping (Skill)|trap]]. | ||
| + | |||
| + | <gallery> | ||
| + | File:Gamecourse litw hideworking.jpg|"Hideworking" objective | ||
| + | File:Gamecourse litw hideworking complete.jpg|"Hideworking" objective completed | ||
| + | </gallery> | ||
| + | |||
| + | ===Setting a trap=== | ||
| + | Passive hunting is the second solution to hunt: instead of tracking your prey, you'll wait for it to come to you! It relies on setting [[trap|traps]] using the [[Trapping (Skill)|trapping skill]]. | ||
| + | |||
| + | For this part of the course, we will make a simple [[light lever trap]] as only a slender tree trunk, two branches and a stone are required for it. You might want to make a couple of them close to each other so there's a higher chance for a catch and they'll be easy to check at the same time. A good location for the trap(s) is next to water so they'll be easy to spot from the water side, and within a short walking distance of your shelter. Not too close though, because we don't want the prey to bother our sleep, do we?. | ||
| + | |||
| + | Later, once we receive a shovel in the agriculture part of this course, you may want to start building a [[trap fence]] as a previous version of this guide suggested: | ||
| + | |||
| + | "Once you've zoomed in, find a line of trees with small (3-6 tile) gaps between them, about 10 tiles long or so. Try to make this near where you entered the area, so that it's easy to find when you come back to check it. Fell lots of small trees, because you need [[slender tree trunk]]s to make both [[Wooden Stake|stake]] for fences, and for the traps themselves. Find your line of trees, and then build fences to plug up small, 1-tile gaps using the {{key|Shift}}+{{key|M}}ake menu (press {{key|t}} for traps, then {{key|f}} for fence). Leave three to five holes in your fence line. That's where we'll place our traps. | ||
| + | |||
| + | The trap we're going to make is called a [[Trapping (Skill)|pit trap]]. It works very well on large herds of herbivores, such as [[Forest reindeer|reindeer]] or elk. First we need to dig a hole, by {{key|a}}pplying our [[shovel]]. Then open up your {{key|Shift}}+{{key|M}}ake menu, hit {{key|t}} for traps and {{key|5}} for a trap pit. You'll need 3 [[slender tree trunk]]s, 10 [[Branch|branches]] and 10 [[Spruce Twig|spruce twig]] per trap. Feel free to take breaks during this process to sleep." | ||
| + | |||
| + | <gallery> | ||
| + | File:Gamecourse litw trapping.jpg|"Setting a Trap" objective | ||
| + | File:Gamecourse litw trapping complete.jpg|"Setting a Trap" objective completed | ||
| + | </gallery> | ||
| + | |||
| + | ===Checking the trap=== | ||
| + | Zoom out to finish the task. The game then tells you to wait one or two days, before coming back to check your trap. Pick up your tanned hide, and try exploring the area and finding a new village. Or you could practice some skills, or fish to increase your food supply. After a few days have passed, zoom back in on your trap. If the game course event won't fire even after multiple days, saving, quitting, and reloading usually helps. | ||
| + | |||
| + | If you haven't got anything, just leave the area, and check it periodically, but with a bit of luck, you'll have caught something. In that case, skin and carve up your prize, then reset the trap through the {{key|Alt}}+{{key|r}} traps menu. If you built a trap pit and think there's too much meat (if you managed to catch an [[Elk|elk]], for example), make a fire so you can cook some immediately (you may need to {{key|d}}rop some meat to be able to move). [[Hideworking (Skill)|Tan]] the hide, then you may want to chop it up for cords through the {{key|Shift}} + {{key|M}} make menu, if you intend to preserve the meat (or chop up your fur cloak, if you have one). | ||
| + | |||
| + | If it's early spring, you can [[drying|dry]] the meat provided you have cords. The side of your shelter should work as a place for drying, so go there, use the cooking menu {{key|Alt}}+{{key|c}}, and select drying. If it's late spring/summer/autumn, you won't be able to dry and you may as well roast it all. | ||
| + | |||
| + | You can also go to the village to dry the meat. Stand beside a building and use its wall as a place to dry the meat. Fence the area off to stop villagers stealing the food. Beware, dismantling fences (even those you placed yourself) in the town will cause the villagers to attack you if they catch you. | ||
| + | |||
| + | ===The [[Settlement|settlement]]=== | ||
| + | In fact, you need to go to a [[Settlement|village]] anyways for the next part of the course. If you wandered too far away from a village you've seen before, hit {{key|F6}} to open up a [[map]]. | ||
| + | |||
| + | <gallery> | ||
| + | File:Gamecourse litw settlement.jpg|"The Settlement" objective | ||
| + | File:Gamecourse litw settlement complete.jpg|"The Settlement" objective completed | ||
| + | </gallery> | ||
| + | |||
| + | ===Trading=== | ||
| + | Once you're in, you need to trade something. A simple 'staff/club for meat cut' trade will do, but you'll need to acquire a raft or punt for the next part of the course. Punts weigh 30 lbs, while rafts weigh 80 lbs. The difference is, you can make a raft, but you have to trade for a punt. Try to get a [[Punt|punt]] by trading away any excess meat from your catch. | ||
| + | |||
| + | <gallery> | ||
| + | File:Gamecourse litw trading.jpg|"Trading" objective | ||
| + | File:Gamecourse litw trading complete.jpg|"Trading" objective completed | ||
| + | </gallery> | ||
| + | |||
| + | ===Watercourse=== | ||
| + | If you can't get one, you'll have to bite the bullet and build a raft<sup>1</sup>. They use 3 [[Tree trunk|tree trunks]] and some cord/rope, and are made through the {{key|Shift}}+{{key|M}}ake menu. All you have to do to complete the task is move onto some water with your raft/punt. To do so, equip either a sesta or a paddle (both can be made), drop the vehicle at your feet, then just use the arrow keys to move into the water. Try to use a paddle, so that you can cross deeper water. | ||
| + | In the task "Watercourse" you get a [[Handaxe|handaxe]]. | ||
| + | |||
| + | <sup>1</sup> You may want to make a raft anyway, as it can carry considerably more weight. | ||
| + | |||
| + | <gallery> | ||
| + | File:Gamecourse litw watercourse.jpg|"Watercourse" objective | ||
| + | File:Gamecourse litw watercourse receivedhandaxe.jpg|Receiving a handaxe for free | ||
| + | </gallery> | ||
| + | |||
| + | ===A catch=== | ||
Next, you have to actually catch something by fishing. This isn't especially hard, just a matter of time. If you want to get some better fish, fish in rapid tiles. Those are the water tiles which have white highlights. You can catch salmon and trout in them, and they are both brilliant sources of food. | Next, you have to actually catch something by fishing. This isn't especially hard, just a matter of time. If you want to get some better fish, fish in rapid tiles. Those are the water tiles which have white highlights. You can catch salmon and trout in them, and they are both brilliant sources of food. | ||
| − | == Building a | + | == Building a house == |
| − | + | ||
| − | + | ===[[Building]]=== | |
| + | Hopefully, completing the course up to this should not have taken a long time. We're going to try and build a little house, nothing fancy, just somewhere to tide us over the winter. Firstly, get some supplies ready. Find a good site to build your house. Islands, especially those on rivers, are ideal. Failing that, go for somewhere surrounded on at least three sides by water. Alternatively, building your house next to rapids will allow you access to water year round without having to break the ice every time as rapids don't freeze. | ||
| − | + | Build your house on the waterfront, because you can transport logs en masse by raft, instead of having to haul them individually. Once you've picked your site, start by building some walls using the building skill ({{key|Alt}} + {{key|b}}). Each section of wall requires 6 logs, which are made from tree [[Tree trunk|trunks]] using the Timbercraft menu. To prepare for an upcoming task, fence off a small area for an animal pen. Note that you don't actually have to finish the whole building to complete this part of the course, just a single wall section. Also note that a shutter does not count as a wall in this course (I dont know about corners) and will not finish it. | |
| − | + | ||
| − | + | ||
| − | + | ||
| − | + | ||
| − | + | ||
| − | + | You don't have to finish the entire house at once, obviously. Take some time off to trade for some nets, or make another trap fence nearby to get a [[Acquiring food|continuous source of food]]. | |
| − | + | ===[[Agriculture]]=== | |
| + | After you've built at least one segment of your future home, you will go on to the Agriculture task. The game will give you a shovel and some seeds for farming. DO NOT eat them! If you eat all of them, you will either have to wait until autumn to grab some vegetables to plant, or you will have to find them in [[Trading|settled areas for trade]]. First prepare your fields by lighting fires on where you want to plow. Previously a good trick for this was to use firewood, but firewood needs a lot of work to acquire, so it's better to use branches/twigs. Branches can be cut from any tree and they are a side product of carving tree trunks into logs, so there should be plenty lying around after the previous task. | ||
| − | + | Probably the fastest way to get the field ready is to arrange branches in piles of 3 in the squares where you want your field to be and light them all individually using the {{key|f}} key. Fires are much easier to light when there's already a fire in the neighboring square. (If you don't wish to light all the fires yourself, you can pile the branches in 4's instead of 3's and light only two squares in a corner. The fire will then spread to other squares once the original fires burn out.) | |
| − | Keep in mind your companions will eventually leave your party to return to their homes. If you chose the longish adventure option, they will tell you in advance 10-13 days before they leave. If you hired them as a helping hand, 2-4 days. The hunting trip will give you a day or two until he leaves. Remember to take any valuables off of him before they leave using | + | Once all the fires have burned out, use the agriculture menu {{key|Alt+a}} to prepare the {{key|s}}oil with your shovel. Wait a day or so, until the embers disappear, then you can {{key|p}}lant/sow some seeds. See the [[Plants]] page to check what plants have enough growing time before their withering month, if you intend to get a harvest. |
| + | |||
| + | Notice, that you'll only need to plant a single square to accomplish this task. If you want to quickly proceed to the next task, preparing and planting a place of an old fire, e.g. where you roasted that fish, is enough. | ||
| + | |||
| + | To keep wild animals from eating your plants, you may want to build a fence around your fields. | ||
| + | |||
| + | Be careful when lighting the fires though, as the fire will spread to other nearby flammable objects and buildings (e.g. fences). | ||
| + | |||
| + | If you start in winter, you'll have to wait until when the weather is warmer, which is months away, to be able to plant seeds. Good for preparing huge tracts of land, not so good if you're looking to breeze through the course. Of course, if it ''was'' your first time -- what are you doing, starting in winter? :P | ||
| + | |||
| + | ===A domestic animal=== | ||
| + | We're almost done with the entire course! Now we need to get an [[Animals|animal]]. Go to a [[village]] with some trading items, and {{key|Shift}}+{{key|C}}hat with any villager. There should be an option to {{key|b}}uy an animal. Pick an animal to trade for, then barter accordingly. Try to buy either a [[Cow|cow]] or a [[Dog|dog]]. Dogs are good hunting companions, while cows can carry a lot and give you milk. Once you get it, ''immediately'' {{key|a}}pply the rope in your inventory to the animal, so that you leash it. Your animal never needs to be fed, unless it's a dog, and it won't die unless you, or something else, kills it. (Unlike other animals, a dog should be fed regularly). Now go home, and [[Climbing (Skill)|climb]] {{key|Alt}}+{{key|l}} into your animal pen, making sure that your animal is inside as well. {{key|a}}pply the leash again to free it. | ||
| + | |||
| + | ===Companion=== | ||
| + | The very last thing you have to do is get a companion. Companions can be recruited from villages. Try {{key|Shift}}+{{key|C}}hatting to the villagers and hit {{key|h}} for 'ask help/company' until you find one that's willing to join you. | ||
| + | |||
| + | Companions want two things in return for working for you, weapons and food. Food shouldn't be a problem if you have a productive [[Trapping (Skill)|trap fence]] or nets. Alternatively, you could trade a staff for some bread, and give it to him. Weapons are a bit more tricky. Companions want different weapons, so simply giving him 10 javelins won't cut it. Try giving him a staff and a javelin, or a club and a staff. If you want him to chop down trees for you, he'll need an axe. Companions won't always ask for weapons but they'll always ask for food. You can order your companion by talking to him, and tell him to stay put, cook food, cut down trees or leave immediately. They help a lot, especially if you get attacked as they will fight with you. | ||
| + | |||
| + | Keep in mind your companions will eventually leave your party to return to their homes. If you chose the longish adventure option, they will tell you in advance 10-13 days before they leave. If you hired them as a helping hand, 2-4 days. The hunting trip will give you a day or two until he leaves. Remember to take any valuables off of him before they leave using {{key|;}}. | ||
== What next? == | == What next? == | ||
| Line 128: | Line 295: | ||
* Finish the house | * Finish the house | ||
| − | * | + | * [[Winter Survival|Brave the horrors of winter]] |
| − | * Try the | + | * Try the [[advanced adventures]] |
* Go on a raid to attack the Njerpez | * Go on a raid to attack the Njerpez | ||
| − | * Just explore the vast world that is | + | * Just explore the vast world that is UnReal World! |
| + | * Go on Robber and Njerpez hunts (they wander randomly across the map.) | ||
Whatever you choose to do, have fun and good luck! | Whatever you choose to do, have fun and good luck! | ||
| + | |||
| + | |||
| + | [[Category:Game courses]] | ||
Latest revision as of 14:28, 30 December 2020
This page will hopefully provide a walkthrough of the most basic course in URW, "Living in the Wild".
But first, of course, we explain character creation. For the purposes of this guide, we'll assume that you know the basic movement keys and know what the interface means. If in doubt, the ? key is your friend! It lists all the common commands. Remember that keys are case-sensitive in Unreal World, so ? is activated by pressing Shift+? and not just ?. You can also check the keyboard commands article.
Have fun!
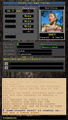
Character Creation
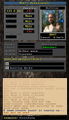
The first step is to choose what type of character creation you want. Quick and easy skips over most of the character creation, dropping you straight into a world, ready to play. Custom is the standard method, while custom-easy allows you to 'degrade' each skill by up to two levels in the skill creation screen and reallocate those points to other skills and custom-too easy allows three points.
Common choices for your culture include the Owl-Tribe (generally strongest at survival skills{Survival has now been removed as of patch 3.30}) and the Kaumolaiset (generally a jack-of-all-trades). Culture affects your starting Skill points, and will determine the possible range of your stats as detailed here.
Next, you have to pick a starting season. As of patch 3.30, Spring now has snow in the earlier months/weeks, as well as ice covered lakes and rivers, meaning you will need to apply some of your winter survival skills, thus as the game recommends starting in Summer; this wiki editor also recommends Summer. You will still have PLENTY of time to prepare for winter. by the end of summer there should be some berries and other wild plants you can gather. Spring Does have some advantages, if you want to test your skill/wit, because it's colder in spring you can dry food in the first couple of weeks, which means your supplies last longer. On the other hand, starting in Autumn may mean that you can gather lots of food such as the highly nutritious lake reeds that border most lakes. Be wary of harvesting villager's plants because they will get angry at you if you harvest anything inside a village, pasture, or field.
Physical attributes are up next. You can reroll as many times as you like until you get your perfect character. One of the most important stats are Agility, Speed and Eyesight, because they govern your dodge skill. Try to go for the highest possible these three attributes. Another option is go for the biggest/heaviest body type, because more body weight lets you carry more. You can improve stats with courses, but you can not change body type. The biggest and heaviest can wear a lot heavy clothes before they affect much to their skills, which is a major consideration middle game. See More about cultures' attributes.
The next page shows 2 rituals. Rituals are sort of like "spells". They will give your character certain benefits, or maybe appease the spirits so that they favor you. Note that not all rituals have a guaranteed result and may only increase probability of a good outcome. What rituals you start with are random. Possible starting rituals change according to what tribe you choose.
Skills are pivotal in how well you'll survive. You have 5 skill points to put into whatever areas you want. Good skills to invest in are:
- Physician - so that your wounds heal better. Increasing this skill can be difficult, as controlled (intentional) injury is a chore. The Blood-Staunching Prayer removes the need for this skill... provided you actually learn it before a Njerpez shoots you in the eye.
- Fishing - while not what it once was, still a valuable skill to generate food. Active fishing is useful even with low fishing skill (in the 30s) as long as you have a fishing rod, but nets are preferable.
- At least one weapon skill, such as:
- >>Club - since blunt attacks control damage to the hide of a catch. Clubs are readily crafted and iron maces/mauls are available, although they may fall behind other options against Njerpez.
- >>Bow - bow skill is very useful in hunting. Recommended, even if you don't choose any combat skill.
- >>Axe - because you almost always have an axe on your hand. Good utilitarian combat skill.
- >>Sword or Flail - this is a pure anti-human combat skill, because these two classes of weapons don't have much use in day-to-day affairs. Sword is more popular than Flail, as many Njerpez sport a sword of some kind.
- >>Spear - because javelins are readily crafted ranged weapons which can also melee in a pinch. A significant boon to players without bow skill, and can be of help to you long into the game.
- Cookery - this is a recommended skill, even though many protest that it has chance to raise. BUT, it's so very useful from the start. Food quality affects both nutrient level and trade value, making the skill a big help in early game whereas its importance fades once food becomes plentiful.
- Hideworking - this is a strong recommendation because you don't have that many chances to practice it, EVEN if you play exclusively small animal hunter, a miserable way to make a living. Get it right at the start so that when you think about tanning furs to trade with foreign traders, you'll have enough skill to make it worthwhile.
- Trapping - trapping obviously helps you get enough food for the winter, but higher quality fox-traps are a good early-game trade good for players with poor carrying capacity.
- Timbercraft - can be raised quickly and won't help you in a fight, but proves surprisingly useful for trading. A tree on village outskirts can be reduced to 20 boards in a few hours, worth ~50 smoked cuts even at inferior quality. Great for solving food problems and getting early access to expensive items... provided local villages have something worth trading.
Notice that you cannot raise your dodge skill. That's tied in directly with your character's Agility, and can only be raised by dodging enemy attacks in game.
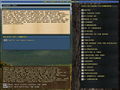
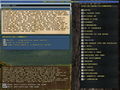
Next, a new game world is created and you are presented with a world map where you get to choose a starting location. You'll want to start in the southeast near Reemi (olive green). Some people think Driik (light blue) is better but there are almost no animals in Driik and Reemi's shops are almost as good as Driik. You can take a trip to Driik once you're all set up, but when you're just starting out, you can't afford the items in their shops anyway so starting there is pointless. Reemi has good enough items and you can actually do some hunting too. *CONTESTED! The difference in wealth between Driik and Reemi is underestimated. While hunters will prefer the game-rich lands of the Reemi, A player with significant carrying capacity and some measure of timbercraft skill can access high quality Driik items early by simply selling boards.
Notice your starting location, which is the dark red rectangle on the map. You can randomize your location until it fits your requirements. Notice its relative distance from certain geographical landmarks, like rivers, big lakes, coasts, etc...
Almost done! Now we have to select a scenario. Unreal World features many starting scenarios, some easy, some hard. We'll go with the easiest one, I want to be a fisherman. That way, you'll have two nets so you won't starve to death and you can use them as a 'home base'.
Lastly, pick a course. We'll go with the second course, "Living in the Wild". Not only do courses give you a structure, it acts as a sort of tutorial, and gives us some nice rewards on the way! (Rewards include a pike, handaxe, and a shovel and seeds) At the end of this line of tasks awaits a choice of reward to be picked by you...
- 5 points to be allocated to your attributes or,
- 3 points to be allocated to your skills or,
- learn 2 new rituals.
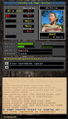
Don't pick rituals, you'll learn them anyway. Up to you whether you want to pick skills or attributes. If your attributes are all really great (the Shift+Profile shows most of the bars all the way full), then pick skills, but otherwise: skills can be raised and this is the only way to increase attributes.
Now is also a good time to learn a little something about trade. Trade is a reliable source of food in the event that your early fishing, hunting or trapping attempts turn up fruitless. Doubtless you will want to purchase more expensive tools or weapons as well as you progress, so having an idea of how to earn them in advance will prove valuable.
Starting Out
*Note* The hotkeys have been updated to the version 3.40b3
Starting the Living in the Wild course
First things first, unless the course menu pops up immediately, we'll start the course by hitting F5, which should bring it up.
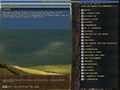
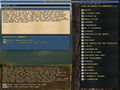
Water
The first task it wants you to do is to find some water, and take a drink. Not too difficult, eh? Just walk around with the arrow keys till you find a lake, then walk next to it and press q for quaff. Task complete!

"Water" objective
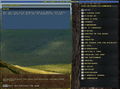
"Water" objective completed


Picking up
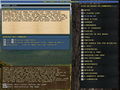
"Picking up" objective

"Picking up" objective completed


A closer look
Next, the game wants you to zoom in. You can either walk to a village, where it'll force you to zoom in, or just hit Enter. Either way, now we have to pick something up. That shouldn't be hard at all, just press , when you walk over something interesting.
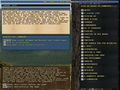
"A closer look" objective

"A closer look" objective completed


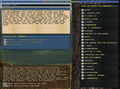
Make a fire
The next task is making a fire. You will soon learn that fire is your best friend for survival, as it will help you to keep warm and for cooking. Making a fire depends on the survival skill. (Removed as of 3.30)
Walk up next to a tree and press Alt+m to use your timbercraft skill. Select the option to 'cut branches/twigs from a tree' (T key). You should get 10-20 branches or twigs. Use p key to push at least 3 of them to an empty square next to you and then use f key to try to start a fire. The chance of success is 50 % so you might need to try a couple times.
Walk up next to a tree, and press Alt+v to bring up the survival menu. Pick the option 'cut branches from tree' to get somewhere in the range of 10 - 20 branches. Keep doing this until you have around 25 branches, then walk one square away, open the survival menu and pick 'build a Fire'. Hit F5 when you're done.

"Make a fire" objective

"Make a fire" objective completed


Cookery
Cooking food is crucial, as it improves the nutrition quality of your food, and usually allows you to keep it longer before it spoils. It depends on the Cookery skill.
You should now have a raw pike in your inventory. Standing next to a fire, open up the cooking menu, Alt+c and pick roast. Choose the pike, and start it roasting. You only need the fire when starting the cooking task. It doesn't matter if it goes out immediately after you've left the pike to cook.
If you are standing nearby, you will receive the prompt, "it smells like the roasted pike is ready" when the pike is ready. If you try to pick it up before it's done, you'll get a message telling you how long it's going to take until it's ready. You can use the - key to pass time until the pike is ready and press Esc to stop when you get the message about it being ready. If left for too long, the pike will burn! When your pike is done, you will have finished another task.
"Cookery" objective
Receiving a fresh pike for free
"Cookery" objective completed


Timberwork
Wood is the resource you will use the most : to make fire, for construction, or to craft objects. So, you'll now have to cut down a tree, using the timbercraft skill.
There are two kinds of tree in URW: normal trees and slender trees. Normal trees give you a whole tree trunk when chopped down, but you need an axe for them. Slender trees can be cut down with just a knife (although it will go faster with an axe) and they will give you 3 - 5 slender tree trunks, which is a completely different item. Go ahead and cut down a slender tree. They look smaller than ordinary trees, and if you walk into them, you should get a message along the lines of 'A young (whatever type of tree) is blocking your way'. Cut them down by opening up your Timbercraft menu Alt+m then picking 'fell a tree'.
"Timberwork" objective
"Timberwork" objective completed


Do it yourself
One of the fun part in URW is to make your own objects. More information is available in the crafting article.
The game now wants you to make something using the 'Make' menu, accessed via Shift+M. Stand next to the slender tree trunks you've cut down. Open the Shift+Make menu, and choose lumber then 2 Staff. Make at least one slender tree trunk into a staff. The task will be finished, but just wait! If you want, you can use these staffs to make a spear class throwing weapon, javelins. Make sure you're standing next to a fire, then open the Shift+Make menu, pick weapons, 4 javelin, and turn your staffs into javelins if you so desire.
Alternatively, you can make a club from a slender tree trunk. It's useful as a blunt melee weapon and can also be used for tanning.
"Do it yourself" objective

"Do it yourself" objective completed


Sleeping (not a course task, but still useful...)
At this point, your character will be hungry, thirsty and tired. Find a water source and have a drink (if you're in a village, all villages have some sort of water source, be it a little pond or a whole lake), eat your pike and take a nap (preferably in a building, if you're near a village). To sleep, press Shift+Z, or / for the movement and rest menu and then sleep.
Fishing
Fishing is a reliable source of food all year round. It uses the fishing skill. To use a net, you'll need to use a raft or punt, you cannot do it by hands.
When you wake up, continue the course. This time, we need to go fishing, and for that you'll get a fishing rod. Walk up to a lake or river (those little ponds don't count) and use your Alt+fishing skill and choose '1 Active Fishing' and then the fishing rod, at this point feel free to sit back and relax. The fishing will go on for around 3 in game hours, less if you manage to catch something. In this part of the course, you don't actually have to catch anything.

"Fishing" objective
Receiving a fishing rod for free
"Fishing" objective completed


Shelter in the woods
Once you're done, we have to make a shelter. Shelters need 3 slender tree trunks and 20 spruce twigs nearby, in your inventory or at most 1 tile away from you. Spruce twigs come from spruce trees, by using your timbercraft skill Alt+m and selecting the option to 'cut branches/twigs from a tree' (T key). One good trick is to find a young spruce tree, harvest twigs, then chop it down for the slender tree trunks. Use the Build menu M to make a shelter.

"Shelter in the woods" objective
"Shelter in the woods" objective completed


Spells
Now we have to perform a ritual F4. Rituals in URW come in two types: asking the spirits for help, or sacrificing something to the spirits. Anyways, just perform any ritual you like (all characters start with two). If you have Oath of Iron, you should use them on your metal weapons, so that they will become better weapons.
"Spell" objective
"Spell" objective completed


Tracking
Search for the wildlife
Hunting is another important resource in Unreal World, as animals provide fur and food. The following task deals with active hunting (opposed to passive hunting, or trapping). But before making a kill, you need to find your prey...
The next task needs you to use your tracking skill to find some tracks. You will probably not find any on the zoomed-out map. Walk around looking for an animal. You will see them best if you are in a mire or if you are in a high area, like on a mountain or a hill. If you see an animal, or person, walk near where they are. Do not walk into them, especially if the picture was of a person in red! Use your tracking skill, Alt+t, repeatedly, then you should finish this task, but you might have to get an encounter with them and do the tracking on the zoomed in map, which is where tracking is most useful.
Some smaller animals, which leave tracks, can't be seen on the zoomed-out map. If you want to cheat, go to a village and walk around till you see little black smudges. Stand on one and type Alt+t.
"Tracking" objective
Receiving an experience increase to Tracking for free


A kill
Next up is actually encountering an animal. If you've managed to find a fresh track, follow it until you collide with your prey. Zoom in, then hit F5 again to trigger the next step. You now have to kill an animal. If you run into something big, like an elk or even a herd of forest reindeer, it may be better to leave them be, and just zoom back out to look for something smaller. If it's something small, like a squirrel, this should be no problem. Simply chase down your quarry, and let loose with a storm of javelins or blunt arrows or rocks in case of a squirrel (press t to throw or shoot) when you get close. If it falls down, Shift+Run to toggle, and 0 kick it till it goes down. If possible, use blunt attack on it to avoid damaging the hide.
Congratulations on your first kill!

"A Kill" objective

Hideworking
Now that you have killed your first prey, it is time to learn what to do with the skin. This is done with the hideworking skill.
After you've hunted your animal, you have to skin and cut it. Remember to always skin the animal before cutting it up for meat, because after you cut it up, the carcass will disappear. Hit Alt+h to open up the Hideworking menu, and choose to 'skin a carcass'. Then, hit b to butcher the carcass for meat. You'll receive a couple pounds of meat, plus some fat. If you really want to (and can spare the food), you could sacrifice a bit of meat to the spirits.
I'd recommend that you set up a temporary camp somewhere close to a village, next to some sort of water source. Build a shelter by the water but outside the village, so that you can tan your animal skin. Villagers have a habit of stealing anything that's not nailed down. Actually tanning the skin will involve several steps in the hideworking menu Alt+h: first the skin must be cleaned, using water (of which you should have plenty, seeing as you're standing next to a lake). Then, use t for tan. The game will ask you for the animal skin, a cutting weapon, and some 'tanning material'. Tanning material can either be tree bark, or animal fat. 99% of the time, an animal will leave enough fat for its skin to be tanned. If not, gather bark from a tree with the Alt+m Timbercraft menu. When done, the skin is left on the spot "being prepared" for some time and you cannot pick it up until the time has elapsed. When that time has passed, pick up the skin to tan again for the next steps.
All these steps can take hours or days for the skin to be tanned depending on its size. While we're waiting, make some more crafts to trade, or replenish your javelin/arrow supply. However don't forget your skin, because if you let the skin uncared for too long in any of the intermediate steps it will rot and become useless.
After your hide is tanned, we're going to make a trap.
"Hideworking" objective
"Hideworking" objective completed


Setting a trap
Passive hunting is the second solution to hunt: instead of tracking your prey, you'll wait for it to come to you! It relies on setting traps using the trapping skill.
For this part of the course, we will make a simple light lever trap as only a slender tree trunk, two branches and a stone are required for it. You might want to make a couple of them close to each other so there's a higher chance for a catch and they'll be easy to check at the same time. A good location for the trap(s) is next to water so they'll be easy to spot from the water side, and within a short walking distance of your shelter. Not too close though, because we don't want the prey to bother our sleep, do we?.
Later, once we receive a shovel in the agriculture part of this course, you may want to start building a trap fence as a previous version of this guide suggested:
"Once you've zoomed in, find a line of trees with small (3-6 tile) gaps between them, about 10 tiles long or so. Try to make this near where you entered the area, so that it's easy to find when you come back to check it. Fell lots of small trees, because you need slender tree trunks to make both stake for fences, and for the traps themselves. Find your line of trees, and then build fences to plug up small, 1-tile gaps using the Shift+Make menu (press t for traps, then f for fence). Leave three to five holes in your fence line. That's where we'll place our traps.
The trap we're going to make is called a pit trap. It works very well on large herds of herbivores, such as reindeer or elk. First we need to dig a hole, by applying our shovel. Then open up your Shift+Make menu, hit t for traps and 5 for a trap pit. You'll need 3 slender tree trunks, 10 branches and 10 spruce twig per trap. Feel free to take breaks during this process to sleep."

"Setting a Trap" objective

"Setting a Trap" objective completed


Checking the trap
Zoom out to finish the task. The game then tells you to wait one or two days, before coming back to check your trap. Pick up your tanned hide, and try exploring the area and finding a new village. Or you could practice some skills, or fish to increase your food supply. After a few days have passed, zoom back in on your trap. If the game course event won't fire even after multiple days, saving, quitting, and reloading usually helps.
If you haven't got anything, just leave the area, and check it periodically, but with a bit of luck, you'll have caught something. In that case, skin and carve up your prize, then reset the trap through the Alt+r traps menu. If you built a trap pit and think there's too much meat (if you managed to catch an elk, for example), make a fire so you can cook some immediately (you may need to drop some meat to be able to move). Tan the hide, then you may want to chop it up for cords through the Shift + M make menu, if you intend to preserve the meat (or chop up your fur cloak, if you have one).
If it's early spring, you can dry the meat provided you have cords. The side of your shelter should work as a place for drying, so go there, use the cooking menu Alt+c, and select drying. If it's late spring/summer/autumn, you won't be able to dry and you may as well roast it all.
You can also go to the village to dry the meat. Stand beside a building and use its wall as a place to dry the meat. Fence the area off to stop villagers stealing the food. Beware, dismantling fences (even those you placed yourself) in the town will cause the villagers to attack you if they catch you.
The settlement
In fact, you need to go to a village anyways for the next part of the course. If you wandered too far away from a village you've seen before, hit F6 to open up a map.
"The Settlement" objective
"The Settlement" objective completed


Trading
Once you're in, you need to trade something. A simple 'staff/club for meat cut' trade will do, but you'll need to acquire a raft or punt for the next part of the course. Punts weigh 30 lbs, while rafts weigh 80 lbs. The difference is, you can make a raft, but you have to trade for a punt. Try to get a punt by trading away any excess meat from your catch.
"Trading" objective

"Trading" objective completed


Watercourse
If you can't get one, you'll have to bite the bullet and build a raft1. They use 3 tree trunks and some cord/rope, and are made through the Shift+Make menu. All you have to do to complete the task is move onto some water with your raft/punt. To do so, equip either a sesta or a paddle (both can be made), drop the vehicle at your feet, then just use the arrow keys to move into the water. Try to use a paddle, so that you can cross deeper water. In the task "Watercourse" you get a handaxe.
1 You may want to make a raft anyway, as it can carry considerably more weight.
"Watercourse" objective
Receiving a handaxe for free


A catch
Next, you have to actually catch something by fishing. This isn't especially hard, just a matter of time. If you want to get some better fish, fish in rapid tiles. Those are the water tiles which have white highlights. You can catch salmon and trout in them, and they are both brilliant sources of food.
Building a house
Building
Hopefully, completing the course up to this should not have taken a long time. We're going to try and build a little house, nothing fancy, just somewhere to tide us over the winter. Firstly, get some supplies ready. Find a good site to build your house. Islands, especially those on rivers, are ideal. Failing that, go for somewhere surrounded on at least three sides by water. Alternatively, building your house next to rapids will allow you access to water year round without having to break the ice every time as rapids don't freeze.
Build your house on the waterfront, because you can transport logs en masse by raft, instead of having to haul them individually. Once you've picked your site, start by building some walls using the building skill (Alt + b). Each section of wall requires 6 logs, which are made from tree trunks using the Timbercraft menu. To prepare for an upcoming task, fence off a small area for an animal pen. Note that you don't actually have to finish the whole building to complete this part of the course, just a single wall section. Also note that a shutter does not count as a wall in this course (I dont know about corners) and will not finish it.
You don't have to finish the entire house at once, obviously. Take some time off to trade for some nets, or make another trap fence nearby to get a continuous source of food.
Agriculture
After you've built at least one segment of your future home, you will go on to the Agriculture task. The game will give you a shovel and some seeds for farming. DO NOT eat them! If you eat all of them, you will either have to wait until autumn to grab some vegetables to plant, or you will have to find them in settled areas for trade. First prepare your fields by lighting fires on where you want to plow. Previously a good trick for this was to use firewood, but firewood needs a lot of work to acquire, so it's better to use branches/twigs. Branches can be cut from any tree and they are a side product of carving tree trunks into logs, so there should be plenty lying around after the previous task.
Probably the fastest way to get the field ready is to arrange branches in piles of 3 in the squares where you want your field to be and light them all individually using the f key. Fires are much easier to light when there's already a fire in the neighboring square. (If you don't wish to light all the fires yourself, you can pile the branches in 4's instead of 3's and light only two squares in a corner. The fire will then spread to other squares once the original fires burn out.)
Once all the fires have burned out, use the agriculture menu Alt+a to prepare the soil with your shovel. Wait a day or so, until the embers disappear, then you can plant/sow some seeds. See the Plants page to check what plants have enough growing time before their withering month, if you intend to get a harvest.
Notice, that you'll only need to plant a single square to accomplish this task. If you want to quickly proceed to the next task, preparing and planting a place of an old fire, e.g. where you roasted that fish, is enough.
To keep wild animals from eating your plants, you may want to build a fence around your fields.
Be careful when lighting the fires though, as the fire will spread to other nearby flammable objects and buildings (e.g. fences).
If you start in winter, you'll have to wait until when the weather is warmer, which is months away, to be able to plant seeds. Good for preparing huge tracts of land, not so good if you're looking to breeze through the course. Of course, if it was your first time -- what are you doing, starting in winter? :P
A domestic animal
We're almost done with the entire course! Now we need to get an animal. Go to a village with some trading items, and Shift+Chat with any villager. There should be an option to buy an animal. Pick an animal to trade for, then barter accordingly. Try to buy either a cow or a dog. Dogs are good hunting companions, while cows can carry a lot and give you milk. Once you get it, immediately apply the rope in your inventory to the animal, so that you leash it. Your animal never needs to be fed, unless it's a dog, and it won't die unless you, or something else, kills it. (Unlike other animals, a dog should be fed regularly). Now go home, and climb Alt+l into your animal pen, making sure that your animal is inside as well. apply the leash again to free it.
Companion
The very last thing you have to do is get a companion. Companions can be recruited from villages. Try Shift+Chatting to the villagers and hit h for 'ask help/company' until you find one that's willing to join you.
Companions want two things in return for working for you, weapons and food. Food shouldn't be a problem if you have a productive trap fence or nets. Alternatively, you could trade a staff for some bread, and give it to him. Weapons are a bit more tricky. Companions want different weapons, so simply giving him 10 javelins won't cut it. Try giving him a staff and a javelin, or a club and a staff. If you want him to chop down trees for you, he'll need an axe. Companions won't always ask for weapons but they'll always ask for food. You can order your companion by talking to him, and tell him to stay put, cook food, cut down trees or leave immediately. They help a lot, especially if you get attacked as they will fight with you.
Keep in mind your companions will eventually leave your party to return to their homes. If you chose the longish adventure option, they will tell you in advance 10-13 days before they leave. If you hired them as a helping hand, 2-4 days. The hunting trip will give you a day or two until he leaves. Remember to take any valuables off of him before they leave using ;.
What next?
Congratulations, you've finished the entire course! Now you can choose between learning new rituals, getting a stat increase or a skill increase. I would recommend getting the stat increase, as there's no other way to increase them.
What to do next? Well, you could:
- Finish the house
- Brave the horrors of winter
- Try the advanced adventures
- Go on a raid to attack the Njerpez
- Just explore the vast world that is UnReal World!
- Go on Robber and Njerpez hunts (they wander randomly across the map.)
Whatever you choose to do, have fun and good luck!